
Thank you for visiting the RAMCHECK web
site, the original portable memory tester.
RAMCHECK LX APPLICATION NOTE INN-8686-APN5
INN-8686-APN5
--Created: 1-17-19
--Updated: 2-12-19
This application note describes how to install the four ground lugs on the sides of the DDR4 Series adapter to improve the ESD Protection. It shows how to use these grounding lugs to connect the anti-static wirst strap. It also illustrates how the user can easily dissipate any electro-static charges in his or her hand by simply touching any of the ground lugs for a brief second just prior to the module insertion.
| Purpose of this Product Upgrade |
| DDR4 memory modules as well as the RAMCHECK LX DDR4 Series adapter are more sensitive to ESD damage than the previous generations of memory devices. Since this process does not require any soldering, users can perform this upgrade in the field, once they get the upgrade kit containing the four lugs. INNOVENTIONS will perform this upgrade for free on any adapter sent for regular service/calibration. All DDR4 Series adapters shipped as of January 15, 2019 already include these ground lugs. |
The following images shows the sides of the DDR4 Series adapter without the new ground lugs:
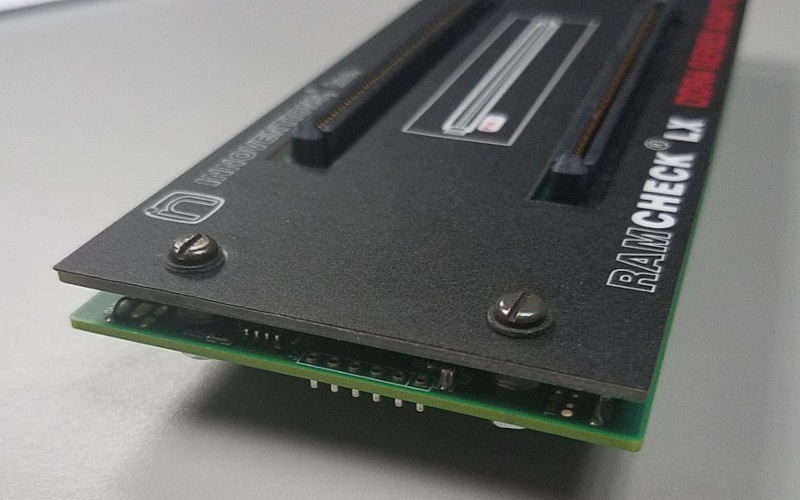
Left side.
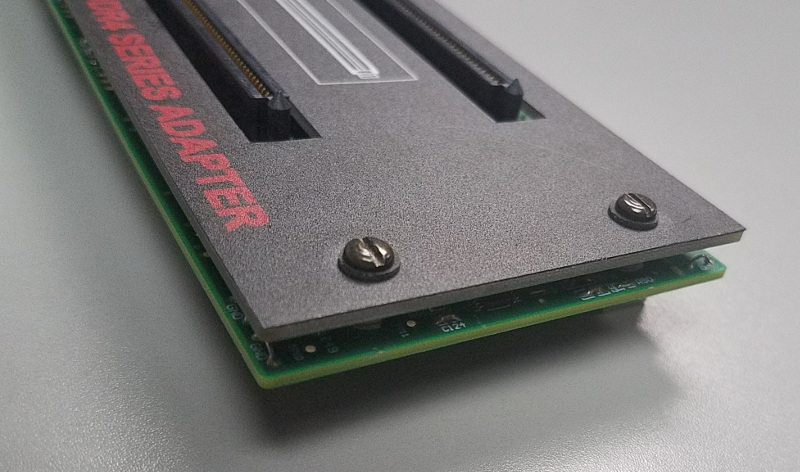
Right side.
Once the upgrade is done, the following images show the sides of the DDR4 Series adapter with the new ground lugs:
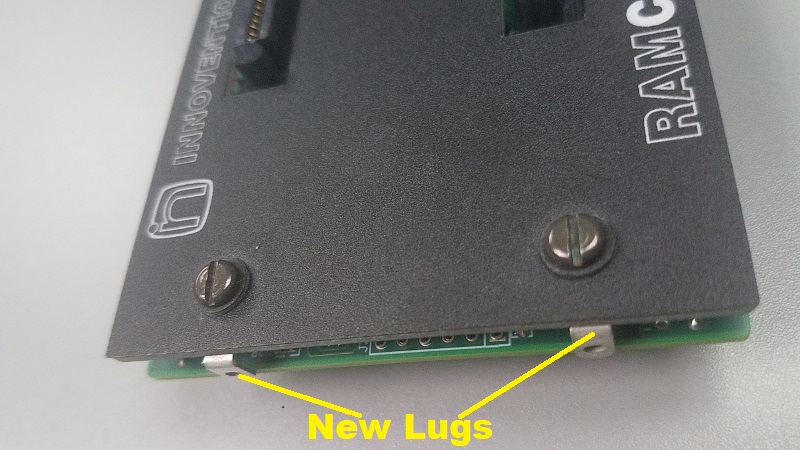
The left side with the new ground lugs.
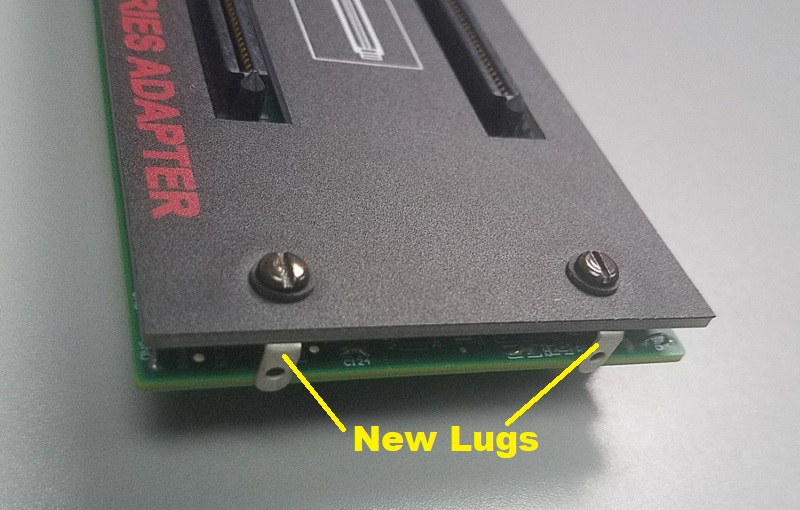
The right side with the new ground lugs.
The upgrade kit includes four (4) lugs that need to be installed. You will need the following simple tools:
Remove the DDR4 Series adapter from RAMCHECK LX, and remove any test head that might be installed on the adapter. Look closely at the four spacers that currently connect between the top board and the main adapter board.
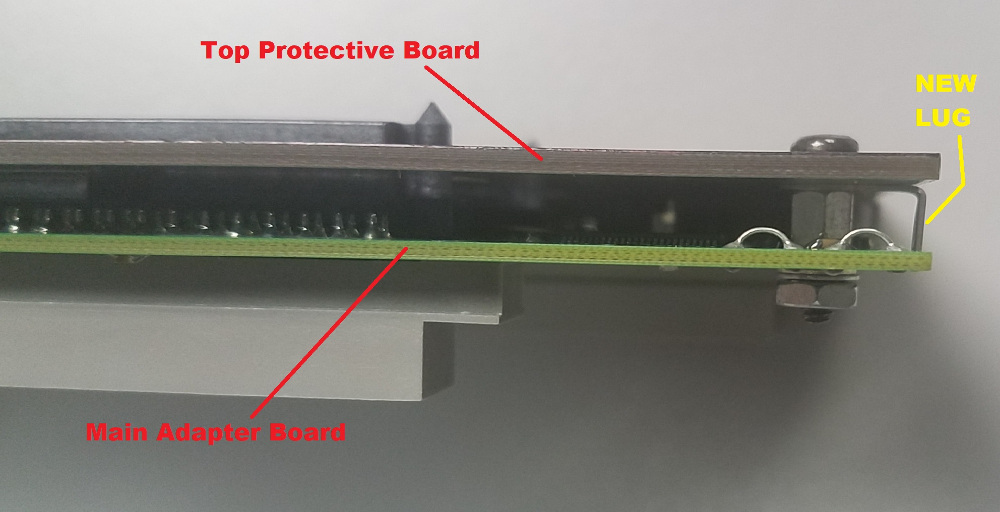
The following image is a close up side view of the screw and spacer that connects the top protective board over the main adapter board. It gives you an orientation view that the new ground lug will be inserted between the spacer and the TOP protective board.
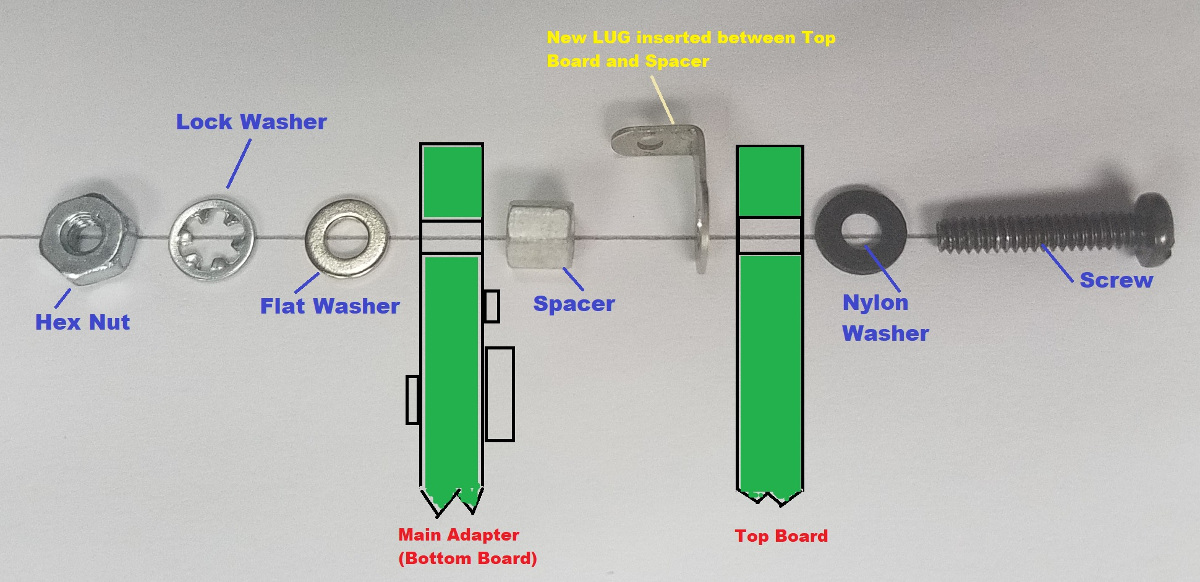
Place the DDR4 Series adapter face down on a clean, static free surface so that you can use the 1/4" nut driver to open the four hex nuts. Carefully collect the four hex nuts, the four lock washers and the four flat washers. The following drawing shows you the order of the hardware placement, including the new lugs.
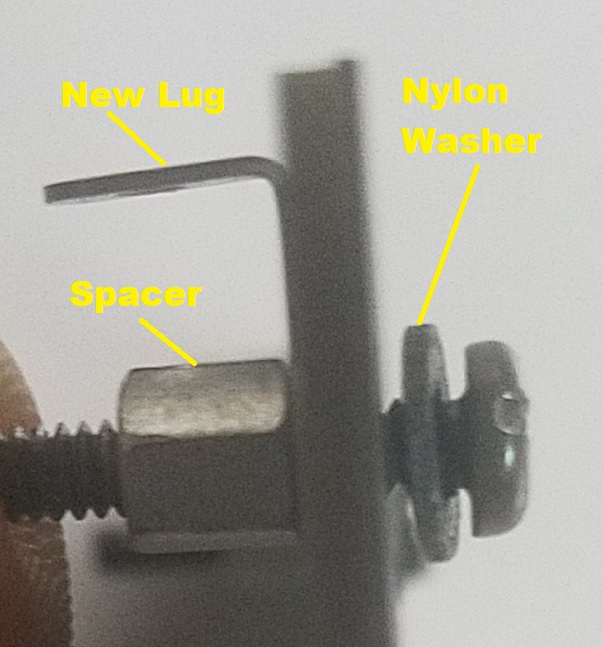
With the four hex nuts removed, carefully separate the top protective board from the main adapter board. Notice that the top screws are screwed inside the spacers. You will need to unscrew the top screws and then install the new ground lugs between the spacers and the screws. Use the screwdriver while holding the spacer with the 5mm nut driver (preferred) or, if you do not have the 5mm nut driver, carefully hold the spacer with a pliers. Now install the four ground lugs between the top board and the spacers, as shown in the following magnified image:
Once you have installed the four new ground lugs between the spacers and the top board, re-mount the top board over the main adapter board. Please refer to the hardware mounting picture above and make sure to put the metal flat washers first under the main board, followed by the lock washers and the hex nuts. Do not overtighten the nuts, the lock washers will hold the nuts in place.
This completes the upgrade process. Now mount the DDR4 test head on the DDR4 adapter and insert the upgraded adapter onto your RAMCHECK LX. As alwayes, you must have RAMCHECK LX turned OFF when removing or mounting adapters.
The new ground lugs are the perfect connection points for your anti-static wrist strap as shown in the following image:
Here is a close up view on how to connect the alligator clip to the first lug on the left side of the adapter (the front left lug). Do not connect the alligator clip to any of the other three ground lugs! Make sure that the alligator clip is only attached to the front left ground lug as shown and that it is not touching any exposed parts on the main adapter board beyond the lug.
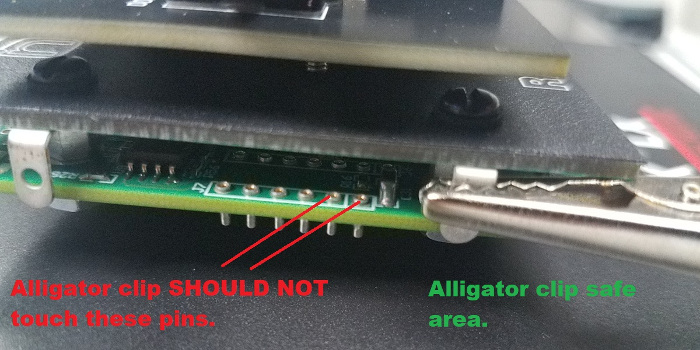
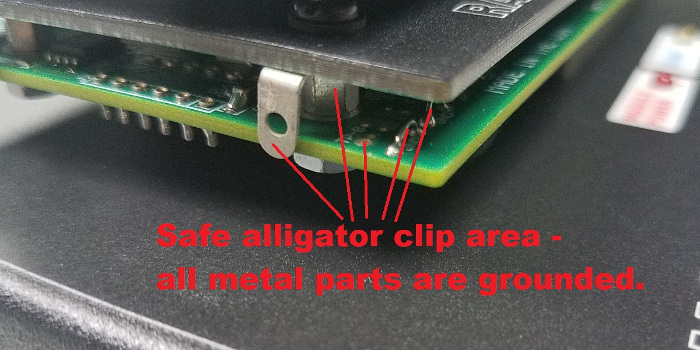
The front left lug is a safe area because all the exposed wire loops and other metal parts on the main adapter in front of this lug are also connected to the ground. Therefore, no harm will be done if the alligator clip inadvertently touches these wire loops and metal parts. This is THE ONLY SAFE ALLIGATOR CLIP CONNECTION AREA on the DDR4 Series adapter:
It is now much safer to insert the modules into the test socket, since the anti-static wrist strap directly connects to the RAMCHECK LX main ground.
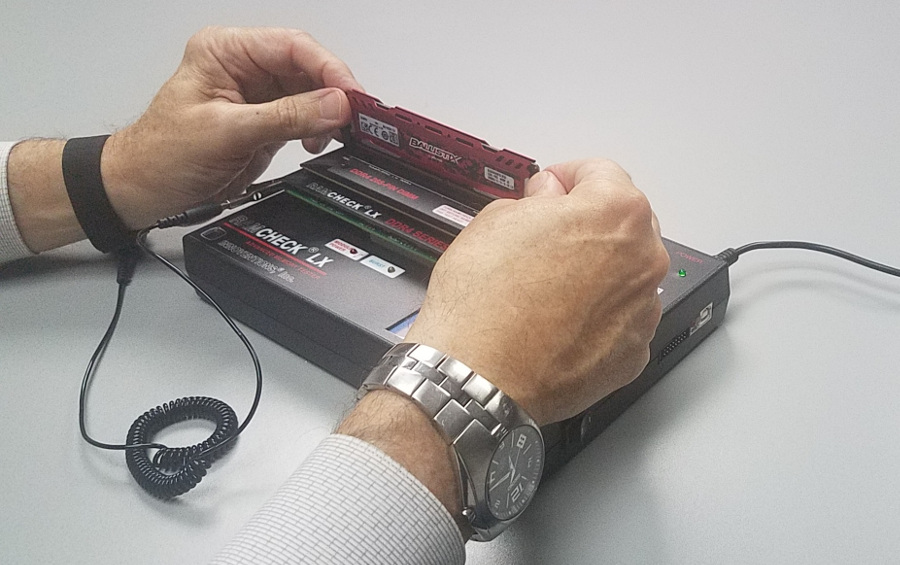
You can touch the left ground lug prior to installing the modules to safely dissipate any charges from your hand.
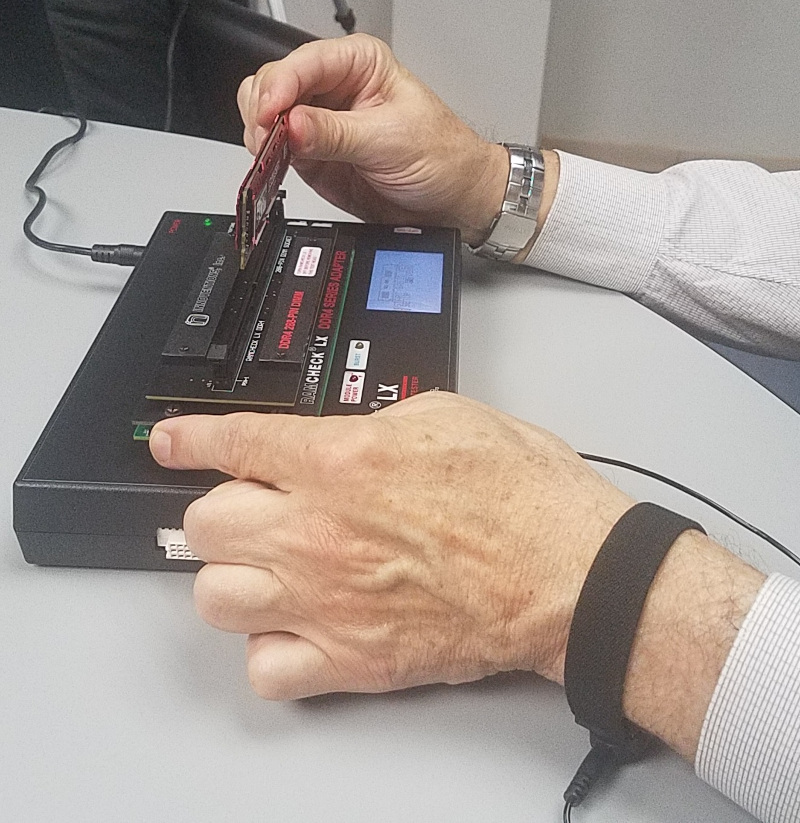
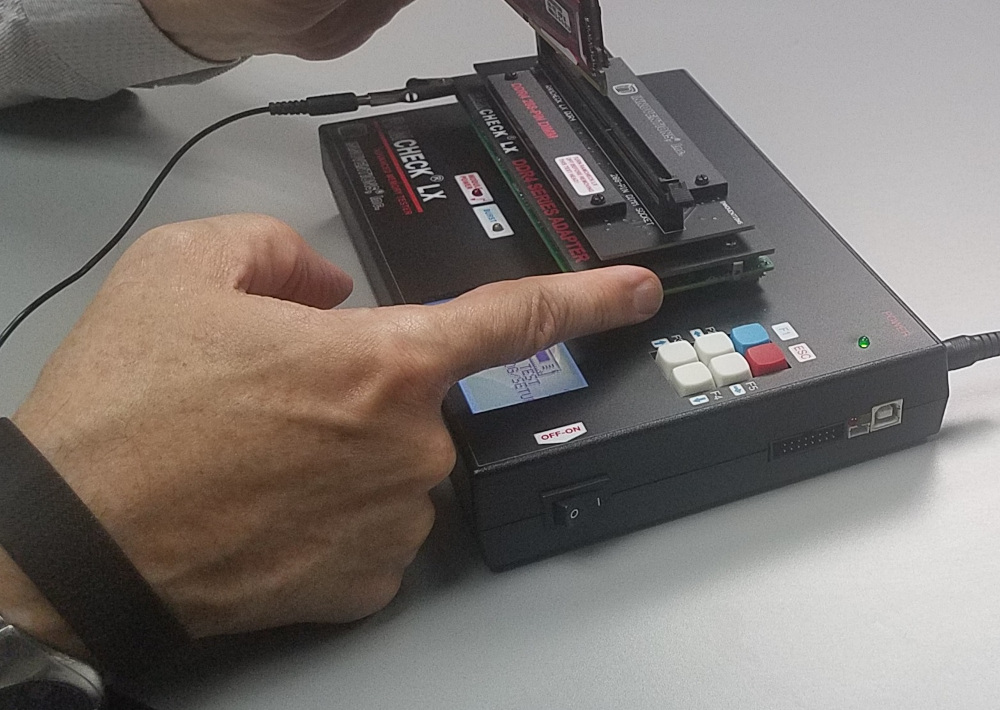
If your facility has only a limited ESD protection, we strongly recommend that you briefly touch the ground lugs prior to the insertion of each module.
You can safely touch any of the new ground lugs on the sides of the DDR4 Series adapter. Just briefly tap the ground lug, and then use both hands to install the modules. Tapping the lug immediately dissipates any dangerous electro-static charge that may be present in your hands.
Touching the ground lug is the best protection and all of us here at INNOVENTIONS are doing it prior to each module insertion.
For more information, please call us at 1-281-879-6226 M-F 9:00-5:00 US Central Time, or send your e-mail to support@innoventions.com. Please remember to include your phone.